The form is partially filled-out in advance |
You can have recipient information that is already known to you, prefilled into the form, when the recipient starts filling out the form. For this purpose proceed as follows:
Setting up the form:
Make sure to include all the questions that you would like to have prefilled, including a question for an email address.
Importing data:
Next you can import the data that you wish to have prefilled from an excel sheet. The paragraph "Import" explains how this works.
Setting up an invitation:
To setup the invitation click the button "Group email" from within the results overview. The link to the form is part of the message. This link ensures that the recipient enters the form which includes his/her registered data. See paragraph "Edit entries link" for more information. Finally send your invitation. |
|
|
|
|
The form is completed in advance |
If you have the information of your recipients, then you can send this information to the recipients by e-mail with the request to correct or complete if necessary. Therefore proceed as follows:
Setup a form:
Make sure to include a question on the form for each piece of information you would like to have verified, including a question for email address.
Importing data:
Next you can import the data from an excel sheet that you wish to have filled-out on the form. The paragraph "Import" explains how this works. Of course this isn't necessary if the form was initially used to collect data, in this case the data is already present on the form.
Setting up a message:
To set up your message, from within the results overview click on the button Group e-mail. To show the imported data in the message, you can use Identifiers or you can show a copy of the completed form. These identifiers and the system code for displaying the completed form can be found by clicking the [abc] button in the toolbar.
Furthermore you will need to include the link in the message with which the recipient can edit the completed form to make corrections. See the paragraph "Edit entries link".
Finally send your invitation.
Importing data:
After the recipients have checked and/or completed their data, you can retrieve the data by clicking on the button "download" from within the results overview. Your data are now up-to-date once more. |
|
|
Sending out reminders |
You can send a reminder to the recipients that have not completed the form after a certain period of time. Because a recipient must be identified in order to determine whether or not he/she has completed the form, we assume the form doesn't have to be anonymous. To send reminder messages proceed as follows:
Setting up the form:
Make sure that you ask for an email address on the form.
Importing e-mail addresses:
To be able to send invitations Formdesk needs email addresses. You can import these email addresses from the excel sheet into the form. See the paragraph "Import" for more information.
Setting up an invitation:
To set up the invitation, click on the button Group e-mail from within the results overview. The link to the form is part of the message. This link ensures that the recipient enters the form which includes his/her registered data. See paragraph "Edit entries link" for more information. Finally send your invitation.
Creating a filter:
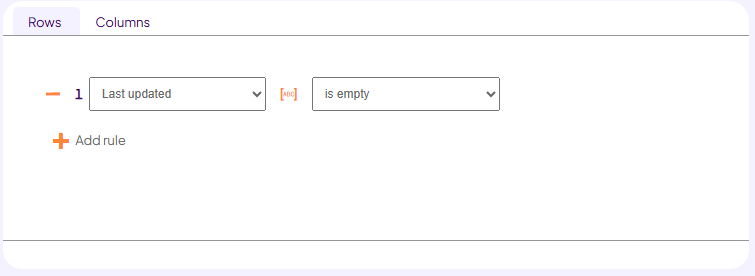
After a period of time you may like to send a reminder to the recipients that have not filled-out the form yet.
For this purpose you will first need to create a filter for the recipients that have not yet responded: |
|
|
 |
|
|
If you provide your visitors with the option to store their form entries and finish later, then you use the "Ready declared" column in the filter.
You can find additional information in the manual on filters.
Setting up a reminder:
Next set up the reminder in the group e-mail. The current invitation message will be overwritten! Because it is not yet possible to save several group e-mail messages, we advise you to copy&paste the invitation from the HTML tab to Notepad on your computer. You can then always copy&paste the message back if you like.
When setting up the reminder it is very important to use the edit entries link (see further on in this document), just like with the invitation.
With the aforementioned filter active you can now send your reminder.
Of course it is possible to send another reminder after a certain period of time. |
|
|
Import |
1. Go to the results overview of the form
2. Click the button "Import" at the bottom of your screen
3. Follow the steps
For more information view the manual of the import feature. |
|
|
Edit entries link |
To make sure that the recipient enters the form which includes his/her registered data, you will need to include an 'edit entries link' in the group e-mail message. To create this link follow the steps below:
1. Click the [abc] button in the toolbar
2. In the new window, select 'System codes'
3. Double-click on 'Edit entries once - link'
For more information, view the manual on how to edit a (partially) completed form. |
|
|
Allow forms to be exclusively available for invited users |
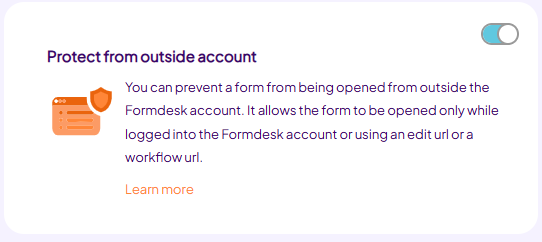
If someone opens your form the common way instead of using the edit entry link (as explained above), a new form can still be submitted. You can prevent this and make sure that only your respondents can access your form using the edit entry link by protecting your form in the Settings tab section Secrurity.
If you want to create new forms yourself manually, then you can use the 'New' button at the bottom of the Results Overview. By use of a filter you are able to send a link to the newly created respondents.
|
 |
|
|
|
|
|
|
|