Which systems? |
The system to which the data needs to be submitted must be ready to receive the submission. Meaning it must be able to receive and process data. For the exchange of data different methods may be used. Formdesk supports the following:
- HTTP GET
- HTTP POST
- HTTP PUT
- HTTP DELETE
- HTTP PATCH
Consult the documentation of the system or contact the supplier to find out whether one of the above methods is supported. You can also send in a request to have us verified whether the system is suitable for Webhooks. |
|
|
Where to set up? |
|
Within the edting mode of a form you'll find the Webhook icon on the left side within the Settings Tab. Click on "New Webhook" to create a Webhook. |
|
|
Predefined Webhooks |
|
Formdesk offers several predefined Webhooks with common systems you can choose from. See the overview of predefined Webhooks and follow the instructions. |
|
|
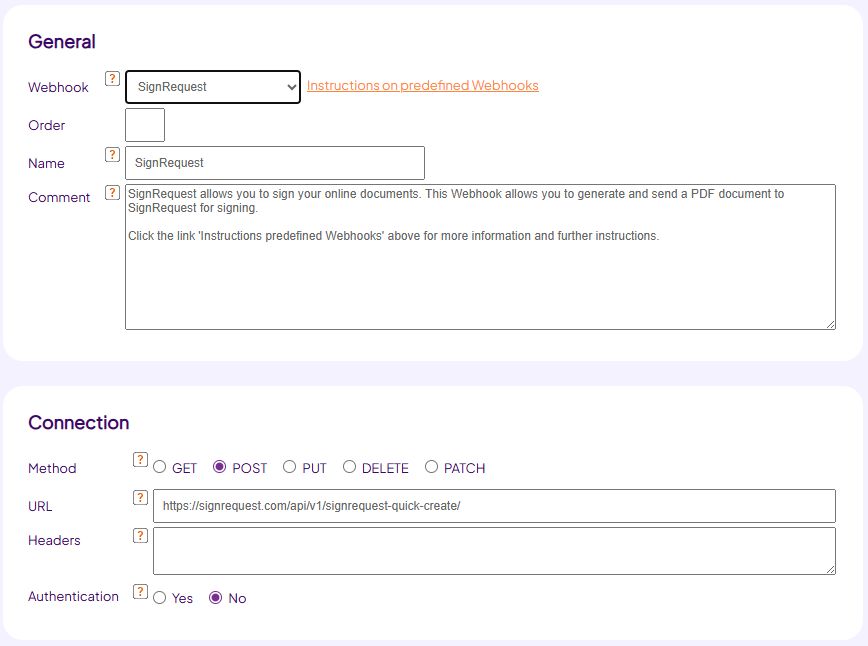
Settings |
When you select a predefined Webhook, you will still need to set it up. This is explained in the instruction notes. When you create your own Webhook, then please consult the documentation of the system for Method (HTTP GET, POST, PUT, DELETE of PATCH), URL, Headers and Authentication.
If you have multiple webhooks, you can also specify the order in which the Webhooks are executed. |
|
|
 |
|
|
Data |
In the section Data you can identify what data you want to send using the Webhook and, if necessary, how to process a possible reply.
In case you have chosen the method HTTP GET or HTTP POST PUT DELETE PATCH Form Data, you can create a mapping. Here you can specify which value belongs to which variable of the other system (parameter). The parameters to be used can be found in the documentation of the system. The "Value" can be a fixed value, a reference to an input (identifier), a system code or a combination of these. An example: 'Submitted on [_fd_Add] by [name]'
|
 |
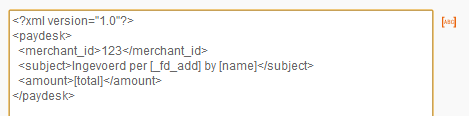
In case you have chosen for the method HTTP POST PUT DELETE PATCH Raw payload, a text area is offered in which you can specify the data as it should be received by the other system. Consult the documentation of your system. An example:
|
 |
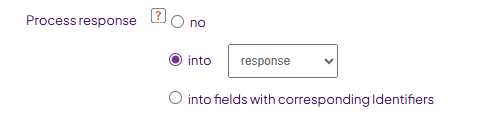
Sometimes a system will send a reply after having received the data. This may for example be an id under which the submission has been stored. You can have the reply be stored in a text field (that you can hide in the Advanced section of that text field). You will be able to view the replies within the Results overview or to show it within a (email) message after form completion. If the reply consists of separate fields in xml or json format, they can be stored in Formdesk fields with corresponding identifiers.
|
 |
If the form allows the user to upload one or more files and/or if you have defined a PDF attachement, then these files can also be sent with the webhook. Please consult the table below to determine wether you will need to use the [_fd_file(identifier)] function for this or if you can just specify the identifierin your situation:
| |
HTTP GET
Form data |
HTTP POST PUT DETELE PATCH
Form data
|
HTTP POST PUT DETELE PATCH
Raw Payload |
| Desired file encoding |
Base64 |
Binary |
|
Uploaded file |
| [Identifier] |
File name |
File name and content |
File name and content |
File name |
| [_fd_file(identifier)] |
N/A |
File content |
N/A |
File content (Base64 encoded string) |
PDF attachment |
| [_fd_pdf] |
N/A |
File name and content |
File name and content |
File name |
| [_fd_file(_fd_pdf)] |
N/A |
File content |
N/A |
File content (Base64 encoded string) |
|
|
|
PDF attachment |
In case you have chosen the HTTP POST or HTTP XML method, you have the option to let the Formdesk PDF Generator create a PDF and have it sent to the system. Just like when using the PDF attachment within (email) messages, you have the option to include form entries, or use a system code for the completed form when setting up the PDF document.
If you use this, then within the Data section you need to specify how the PDF needs to be received within the system. Please consult the table of the section "Data". |
|
|
Sending criteria |
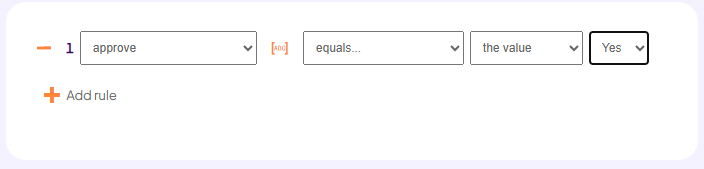
It may very well be the case that you don't want to send the data to the other system in all situations. For example, if in an order form, you ask whether your users want to receive the newsletter in case you'd like to interface to an email system. The Webhook then only needs to be executed in case the user indicates the wish to receive the newsletter. Furthermore it may be desired for the Webhook to be executed only after the filled-in form has been approved within the workflow.
In these situations you use Sending criteria to indicate when the Webhook needs to be executed.
|
 |
|
|
Re-submitting a Webhook |
|
If the Webhook cannot access the other system, then Formdesk will continue the regular completion and the Webhook won't be executed. You can however always manually execute the Webhooks from within the Results overview. Sending criteria that have been set up, will be respected. |
|
|
Webhooks and workflow |
Each time the form is sent, initially, or from within the workflow, then Formdesk will first execute all Webhooks and afterwards send all email messages, respecting the sending criteria. This way you can have the Webhook be executed after approval within a workflow or make the workflow dependant upon the reply received from the Webhook.
After the last workflow step, when the status changes from "workflow to be submitted" to "completed", the Webhooks will be executed once again. This means that if you'd only have one workflow message, the sequence would be:
1. Initial sending by the user
2. Webhooks execution
3. Sending of Workflow message
4. Webhooks execution
You can include the status of the workflow in the sending criteria of your webhook. This may for example be useful if you want your webhook to be executed only when the workflow is fully completed. |
|
|
Security |
The data will always be sent encrypted (HTTPS).
If desired, an additional layer of security can be applied by specifying an encryption key in the Data section. The receiving party will be able to decrypt the data again with this key.
The method used is AES256 mode GCM. The length of the key must therefore be 256 bits or 32 characters. This method uses an Initialization Vector (IV) of 96 bits (12 characters). This is generated each time by Formdesk and added as a prefix to the encrypted string.
So for decryption the IV (1st 12 characters) must be separated from the body. The IV is needed to decrypt the remainder of the body together with the encryption key. |
|
|
|
|
|
|
|